- Unity 用户指南 (2019.1)
- 在 Unity 中操作
- Packages
- Packages window
- Adding and removing packages
- Disabling a built-in package
Disabling a built-in package
You can disable a Built-in package if you don’t need some modules and you want to save resources. However, when you disable a built-in package, the corresponding Unity functionality is no longer available. This results in the following:
- If you use a Scripting API implemented by a disabled package, you get compiler errors.
- Components implemented by the disabled built-in package are also disabled, which means you cannot add them to any GameObjects. If you have a GameObject that already has one of these components, Unity ignores them in Play mode. You can see them in the Inspector window but they are greyed out to indicate that they are not available.
- When building a game, Unity strips all disabled components. For build targets which support engine code stripping (like WebGL, iOS, and Android), Unity doesn’t add any code from a disabled built-in package.
To disable a built-in package:
-
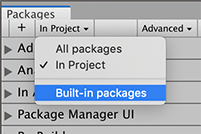
Open the Packages window and select Built-in packages from the package scope drop-down menu.

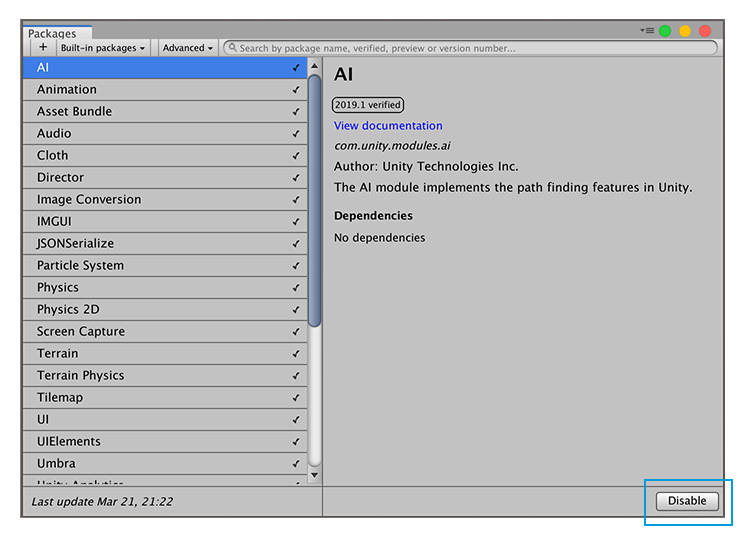
Switch the scope to Built-in packages Select the built-in package you want to disable. Its information appears in the details view.
-
Click the Disable button.

Disable button in the bottom right corner of the details view When the progress bar finishes, the check mark no longer appears next to the built-in package and the Disable button becomes an Enable button.
If you want to re-enable a disabled built-in package, click the Enable button.
- 2019–04–11 Page published with editorial review
Copyright © 2019 Unity Technologies. Publication 2019.1