导读
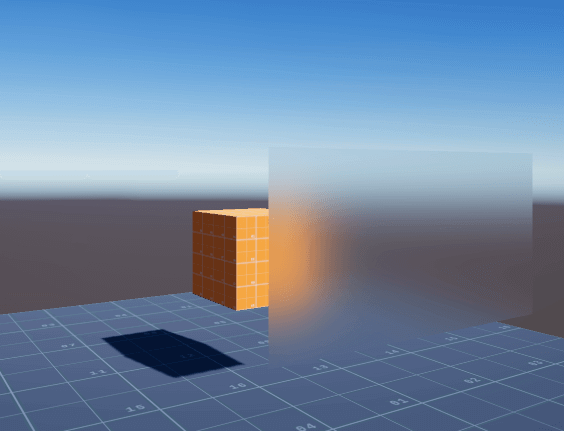
玻璃效果是游戏场景中常见的效果之一,除却普通的透明玻璃外,磨砂玻璃也是较为常见的效果。玻璃与场景中的其他物体也会有交互,例如,浴室中的玻璃、雨天的窗户会在水汽的作用下带有一定差别的雾效。本文以Unity Frosted Glass项目与开源库中相关项目为例,介绍磨砂玻璃的做法和在移动端运行的性能。
开源库链接:https://lab.uwa4d.com/lab/5b5613a3d7f10a201fd80bbb
模糊效果
磨砂玻璃的效果特点是模糊与半透明,该项目通过自定义的卷积实现来达到模糊效果。具体代码实现在FrostedGlass.shader中。
//vertex to fragment
struct v2f {
  float4 pos : POSITION;
  float2 uv : TEXCOORD0;
  float4 uv01 : TEXCOORD1;
  float4 uv23 : TEXCOORD2;
  float4 uv45 : TEXCOORD3;
};

v2f vert (appdata_img v) {
  v2f o;
  o.pos = UnityObjectToClipPos(v.vertex);
  o.uv.xy = v.texcoord.xy;
  o.uv01 =  v.texcoord.xyxy + offsets.xyxy * float4(1,1, -1,-1);
  o.uv23 =  v.texcoord.xyxy + offsets.xyxy * float4(1,1, -1,-1) * 2.0;
  o.uv45 =  v.texcoord.xyxy + offsets.xyxy * float4(1,1, -1,-1) * 3.0;
  return o;
}
(顶点着色器及相关数据结构SeparableGlassBlur.shader)
offsets是一个float4类型的定值,表示偏移量。通过顶点着色器的运算,输出的v2f结构体中,pos存储了该顶点从Object Space转换到相机裁剪空间中的齐次坐标。uv、uv01、uv23、uv45分别储存了该顶点、偏移量为offsets的两个顶点、偏移量为2offsets的两个顶点、偏移量为3offsets的两个顶点的uv坐标。
half4 frag (v2f i) : COLOR {
  half4 color = float4 (0,0,0,0);
  color += 0.40 * tex2D (_MainTex, i.uv);
  color += 0.15 * tex2D (_MainTex, i.uv01.xy);
  color += 0.15 * tex2D (_MainTex, i.uv01.zw);
  color += 0.10 * tex2D (_MainTex, i.uv23.xy);
  color += 0.10 * tex2D (_MainTex, i.uv23.zw);
  color += 0.05 * tex2D (_MainTex, i.uv45.xy);
  color += 0.05 * tex2D (_MainTex, i.uv45.zw);
  return color;
}
(片元着色器 SeparableGlassBlur.shader)
该卷积核的一维权重分布如下表所示:

(进行滤波操作 CommandBufferBlur.cs)_CommandBuffer.SetGlobalVector("offsets", new Vector4(2.0f / sizes[i].x, 0, 0, 0));
 _CommandBuffer.Blit(blurredID, blurredID2, _Material);
_CommandBuffer.SetGlobalVector("offsets", new Vector4(0, 2.0f / sizes[i].y, 0, 0));
_CommandBuffer.Blit(blurredID2, blurredID, _Material);
对图像使用水平方向一维卷积核与竖直方向一维卷积核进行两次滤波得到最终的图像。等同于如下图所示的二维卷积核进行滤波:
卷积核的选择有很多种,其中较为常用的有高斯模糊、kawase Blur,开源库中有相关的项目实现了相关效果,例如:Blur for Unity、Gaussian Blur、Super Blur。

这些模糊方式,所采用的卷积核各不相同,有兴趣的读者可以进行相关试验。
捕捉屏幕纹理
实现模糊效果后,需要捕捉到玻璃后方的屏幕效果图片交予模糊效果着色器进行处理。在Unity Shader中有一种特殊的Pass:GrabPass,可以很方便地获取屏幕图像。但这种方式开销太大,并不适合在移动端运行。
该项目采取CommandBuffer来达到这一目的。可以节省开销、提高性能。
//创建名为“Blur screen”的CommandBuffer
_CommandBuffer = new CommandBuffer();
_CommandBuffer.name = "Blur screen";

int screenCopyID = Shader.PropertyToID("_ScreenCopyTexture");
//新建一个临时RenderTexture
_CommandBuffer.GetTemporaryRT(screenCopyID, -1, -1, 0, FilterMode.Bilinear, _TextureFormat);
//获取当前屏幕图像
_CommandBuffer.Blit(BuiltinRenderTextureType.CurrentActive, screenCopyID);
int blurredID = Shader.PropertyToID("_Grab" + i + "_Temp1");
int blurredID2 = Shader.PropertyToID("_Grab" + i + "_Temp2");
_CommandBuffer.GetTemporaryRT(blurredID, (int)sizes[i].x, (int)sizes[i].y, 0, FilterMode.Bilinear, _TextureFormat);
_CommandBuffer.GetTemporaryRT(blurredID2, (int)sizes[i].x, (int)sizes[i].y, 0, FilterMode.Bilinear, _TextureFormat);
_CommandBuffer.Blit(screenCopyID, blurredID);
_CommandBuffer.ReleaseTemporaryRT(screenCopyID);
(获取屏幕图像 CommandBufferBlur.cs)
但此时获取到的图像是一整张屏幕图象,而我们需要进行模糊处理的图像,只有玻璃模型背后的图像,这时我们需要在顶点着色器中对顶点进行处理。
v2f vert (appdata v)
{
  v2f o;
  o.vertex = UnityObjectToClipPos(v.vertex);
  //确保材质球中的缩放和偏移位置正确
  o.uvfrost = TRANSFORM_TEX(v.uv, _FrostTex);
  //获得该顶点在屏幕图象中正确的纹理坐标
  o.uvgrab = ComputeGrabScreenPos(o.vertex);
  return o;
}
Unity内置的ComputeGrabScreenPos函数,帮助我们完成了坐标转换,根据o.uvgrab在屏幕图像中采集到的图像信息,便是玻璃模型背后的屏幕图像:
half4 ref00 = tex2Dproj(_GrabBlurTexture_0, i.uvgrab);
将CommandBuffer挂载到相机上,实现实时更新渲染。
_Camera.AddCommandBuffer(CameraEvent.BeforeForwardAlpha, _CommandBuffer);
水雾玻璃
在磨砂玻璃的基础上,进一步拓展其他的特殊效果。
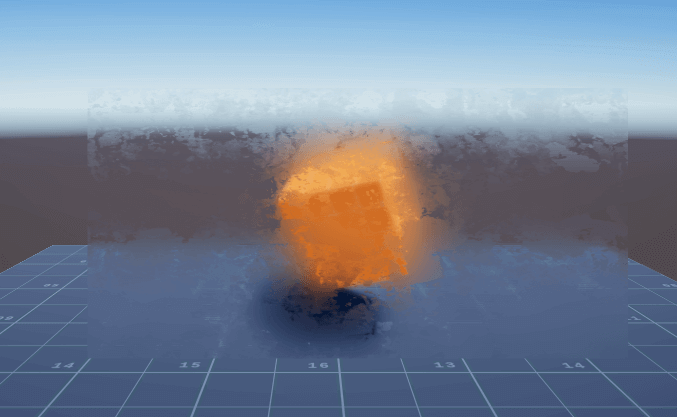
浴室中的玻璃、雨天的窗户会在水汽的作用下带有一定差别的雾效。这种效果的特点除却模糊与半透明外,还会有模糊程度的差别。
Vector2[] sizes = {
  new Vector2(Screen.width, Screen.height),
  new Vector2(Screen.width / 2, Screen.height / 2),
  new Vector2(Screen.width / 4, Screen.height / 4),
  new Vector2(Screen.width / 8, Screen.height / 8),
};
(定义不同大小的偏移量 CommandBufferBlur.cs)
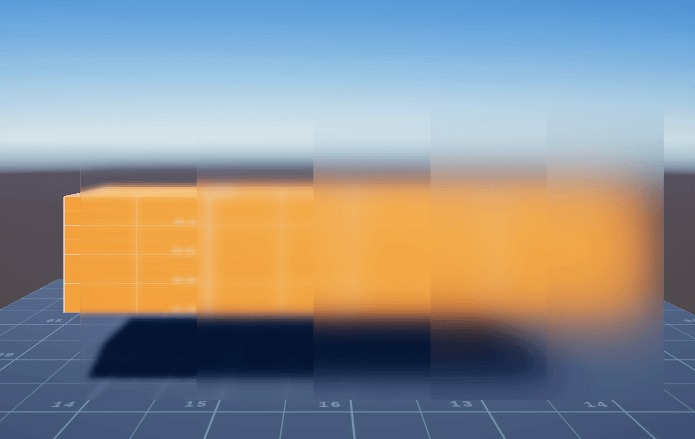
定义不同大小的偏移量,通过SeparableGlassBlur.shader的运算,得到四张模糊程度不同的屏幕图像,由0~3模糊程度加深:
        sampler2D _GrabBlurTexture_0;
        sampler2D _GrabBlurTexture_1;
        sampler2D _GrabBlurTexture_2;
        sampler2D _GrabBlurTexture_3;
制定采样规则从这四张模糊程度不同的屏幕图像中进行采集,为了让过渡圆滑,使用lerp函数进行插值。加载一张效果灰度图(_FrostTex),确定雾效差别的强度(_FrostIntensity):
fixed4 frag (v2f i) : SV_Target
{
  float surfSmooth = 1 - tex2D(_FrostTex, i.uvfrost)* _FrostIntensity;
  //如果x 值小于 a,则返回a;如果 x 值大于 b,返回b;否则,返回 x
  surfSmooth = clamp(0, 1, surfSmooth);
  half4 refraction;
  //二维纹理投影映射
  half4 ref00 = tex2Dproj(_GrabBlurTexture_0, i.uvgrab);
  half4 ref01 = tex2Dproj(_GrabBlurTexture_1, i.uvgrab);
  half4 ref02 = tex2Dproj(_GrabBlurTexture_2, i.uvgrab);
  half4 ref03 = tex2Dproj(_GrabBlurTexture_3, i.uvgrab);
  //进行平滑过渡
  float step00 = smoothstep(0.75, 1.00, surfSmooth);
  float step01 = smoothstep(0.5, 0.75, surfSmooth);
  float step02 = smoothstep(0.05, 0.5, surfSmooth);
  refraction = lerp(lerp(lerp(ref03, ref02, step02), ref01, step01), ref00, step00);
  return refraction;
}
(片元着色器 FrostedGlass.shader)
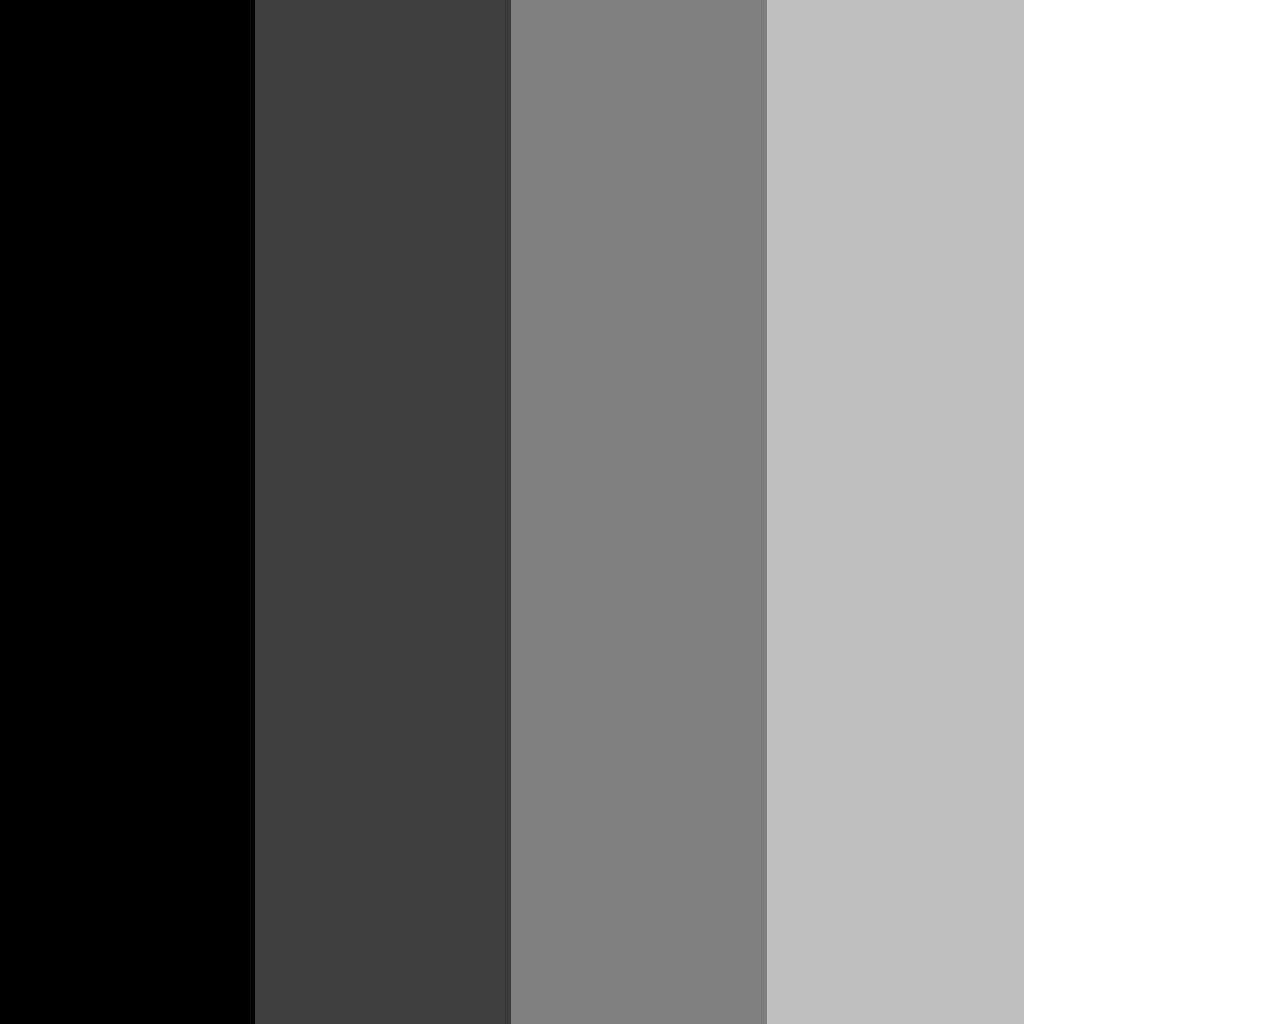
项目中以_FrostTex图像中r值作为采样依据。根据1-r值*_FrostIntensity得到的数值(surfSmooth)为权重,分别从上述四张模糊程度不同的屏幕图像中进行采集,最后得到该顶点最终的颜色。
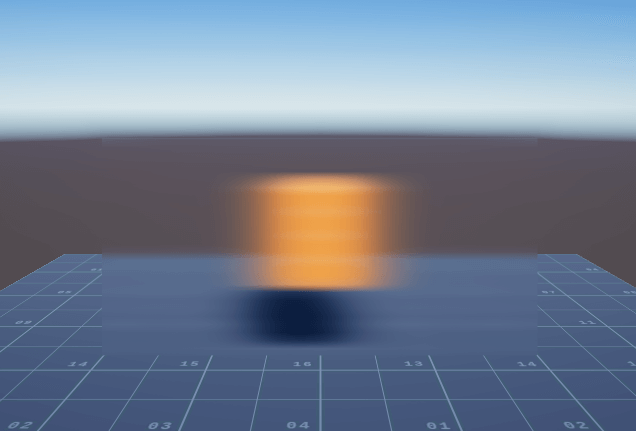
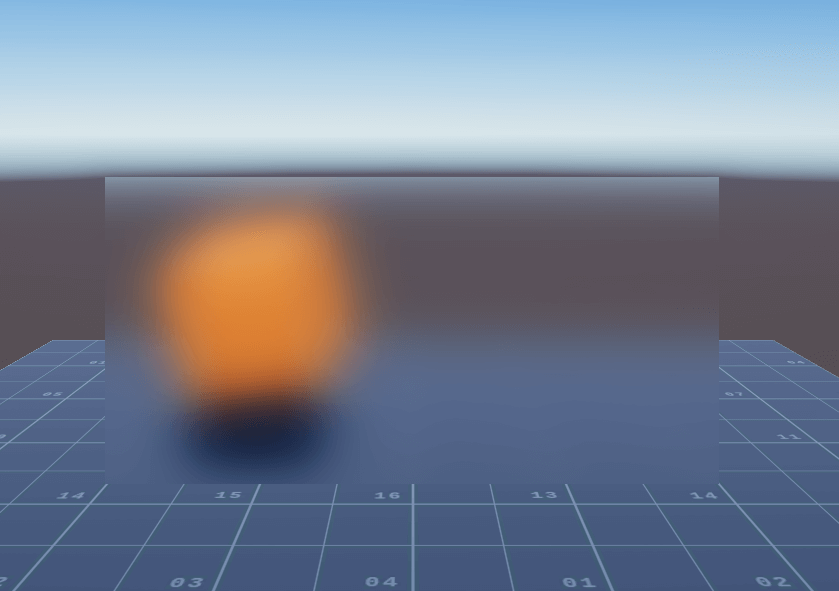
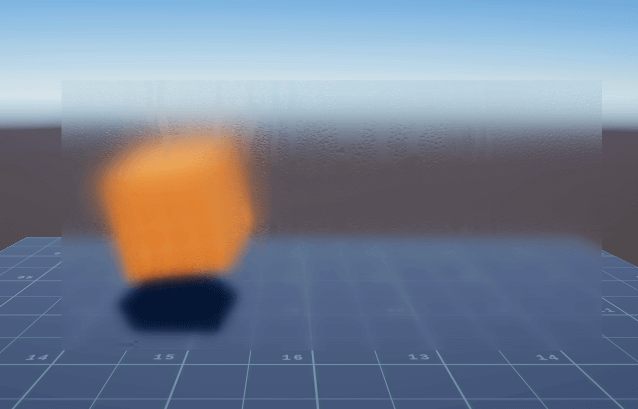
以下图作为效果图,验证不同的surfSmooth大小,渲染得到不同的模糊程度:
由此可以模拟出不同的水雾玻璃效果:
性能测试 (使用UWA GOT Online工具测评)
选择低端机型红米4x进行测试(不开启多线程渲染):
使用水雾玻璃效果:

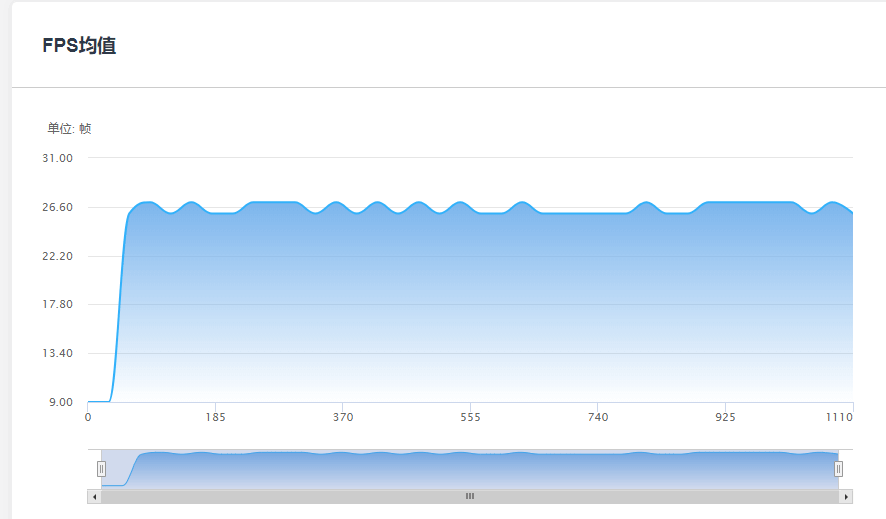
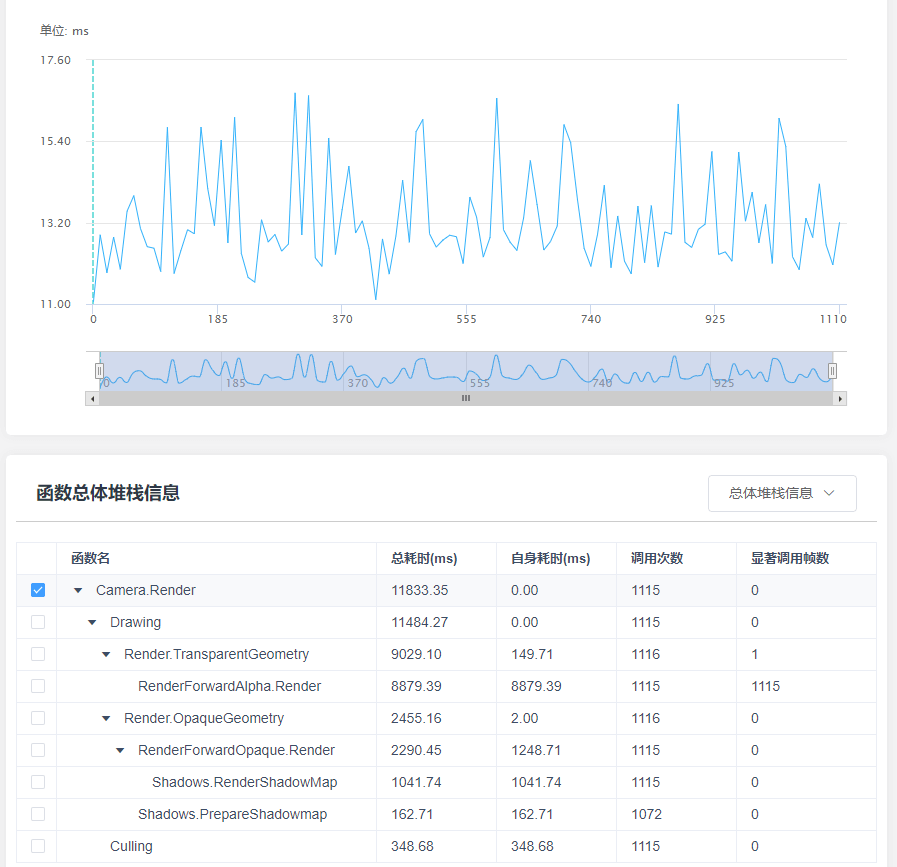

可见实时抓取屏幕图片并进行渲染操作在移动端开销还是巨大的。该效果生成四张模糊效果图片,每张图片的生成通过了两次SeparableGlassBlur.shader的计算。最终每个顶点在FrostedGlass.shader中进行运算。GPU计算量过大。
只使用磨砂玻璃效果时,红米4xFPS均值为42帧左右。
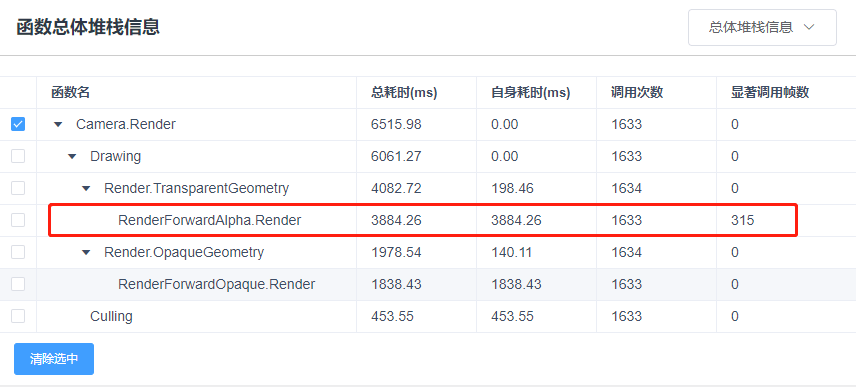
此时只生成一张模糊效果图片,该图片的生成通过了两次SeparableGlassBlur.shader的计算。相比较而言GPU端计算大幅减少,CPU等待时间缩短,性能提升明显。
故而开发者在实现此效果时,需要在性能与效果之间平衡,尽可能减少计算量,例如可以使用3x3的卷积核,而不是5x5的,可以在采样之前做判断,减少采样次数。
今天的推荐就到这儿啦,或者它可直接使用,或者它需要您的润色,或者它启发了您的思路......
文章来源: Unity Shader之磨砂玻璃与水雾玻璃效果


